How to Do Easy Makeup for Beginners Step by Step
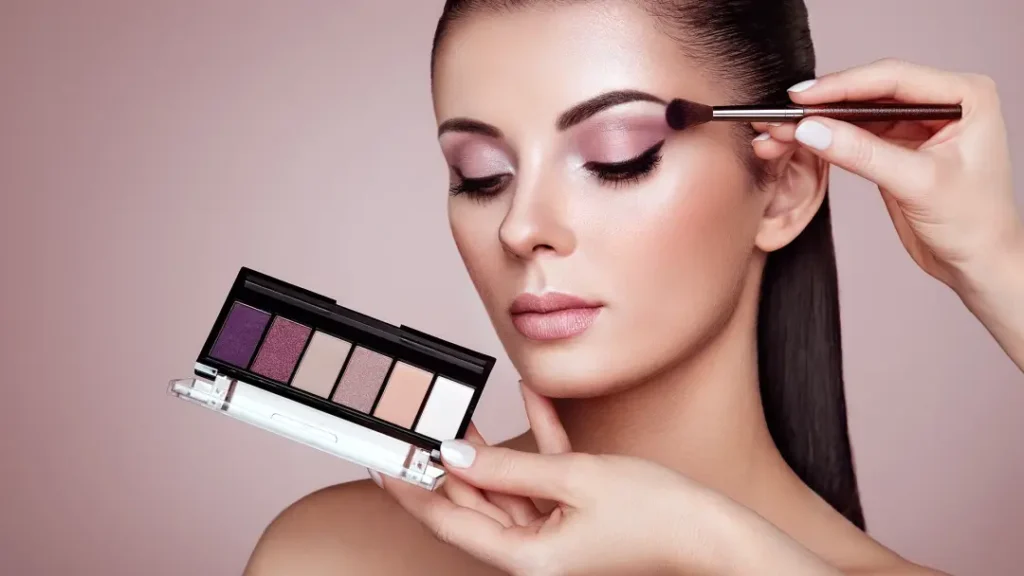
Makeup for Beginners Starting to wear makeup can feel like learning a new language. Watching videos with lots of different steps and products can make you feel confused. But the good news is, you don’t need to use many products or do complicated tricks to look pretty. This simple makeup guide shows you how to get a natural, nice look in just 15 minutes. It’s perfect for beginners and easy to follow—no fancy tools needed, just simple steps. Whether you’re going to school, work, or just want to feel good, this guide will help you get ready easily. Want to find your new everyday makeup routine?
Essential Makeup Products Every Beginner Needs
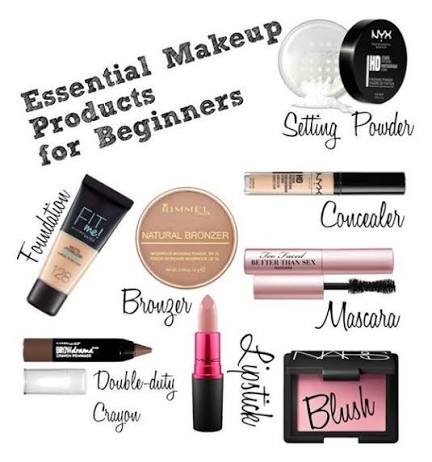
Before learning new makeup tricks, let’s talk about how to put together a simple makeup kit without spending too much money. The beauty world makes us think we need lots of products, but a good basic routine only needs a few important items. Think of it like a starter kit—you can add more things later, but these basics will help you do simple and pretty makeup looks. The best tip for beginners? Start with just a few products, practice, and feel good about what you can do. You don’t need a big collection to look nice.
Must-Have Base Products
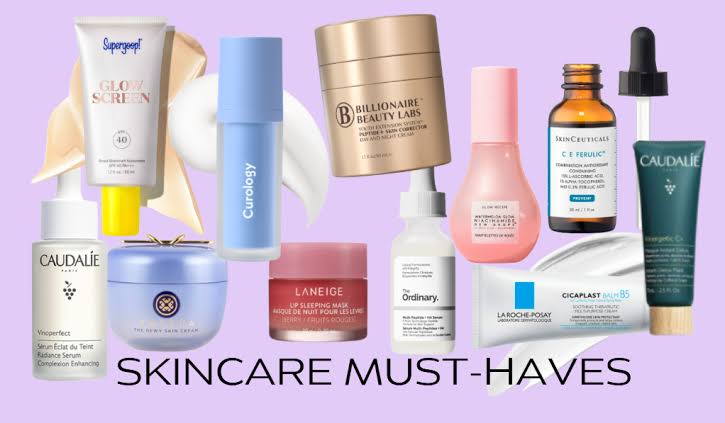
Your basic skincare is very important, so let’s make it simple. A good moisturizer with SPF protects your skin and keeps it soft. Find one that is light and absorbs quickly. Primer might seem like an extra step, but it helps your makeup stay on longer and look smoother. If you want a natural look, sometimes just using a good moisturizer is enough. Foundation doesn’t need to be heavy to look nice. A light foundation or skin tint gives you a natural look that makes your skin look healthy and fresh, perfect for everyday. Concealer is great for hiding spots and making your under-eye area look bright. Just a small amount of it can do a lot.
Simple Eye and Face Essentials
For your eyes, a neutral eyeshadow palette is super helpful. The simple brown and beige colors might seem boring, but they are actually the most useful colors to have. Just a few simple brushes—a fluffy one for blending and a flat one for applying—are enough for most eyeshadow looks. Blush makes your cheeks look lively, bronzer adds a warm glow, and highlighter makes your skin look shiny and bright. Mascara makes your eyes look bigger, and brow gel keeps your eyebrows neat. These are the main makeup items you need to start with.
Prep Your Skin: The Foundation of Any Easy Makeup Tutorial
Good makeup begins with taking care of your skin first—it’s not just silly talk from beauty experts, it really helps. When your skin is clean and ready, your makeup goes on more smoothly, looks more natural, and stays on longer. This step helps you do well with any simple makeup look you want to try. Think of skin prep like making a smooth blank paper before drawing on it. You wouldn’t want to paint on a bumpy surface, right? The same idea applies here.
5-Minute Skincare Prep
Start with clean skin—use your normal face wash in the morning, or just splash water if your skin isn’t oily. Gently pat your face dry, then put on your moisturizer, moving your hand upward. Wait a minute so it can soak in. Always put on sunscreen, even if you’re inside. The sun’s rays can go through windows, and wearing sunscreen now helps keep your skin healthy later. If your moisturizer doesn’t have sunscreen, put on a separate layer of sunscreen on top. Wait a few minutes before doing anything else.
Colour-Correcting for Beginners
Colour-correcting might sound complicated, but it’s easy. If your nose or chin looks red, using a little green primer can help hide it. If you have dark circles under your eyes, a peach or orange corrector can make them look better before using concealer. But you don’t have to use colour-correcting if you like how your skin looks with just foundation and concealer. The most important thing is that you feel good about how you look, not following all the rules.
Step-by-Step Foundation and Concealer Application
Now for the fun part—making a nice, natural-looking base that doesn’t look like a mask. The secret to a good foundation is to add a little bit at a time, instead of putting on a lot all at once and hoping it looks good. Your skin should still look like your skin, just nicer. Remember, foundation isn’t meant to change your face completely. It’s there to make your skin tone even and give you a smooth surface for the rest of your makeup.
Foundation Application Techniques
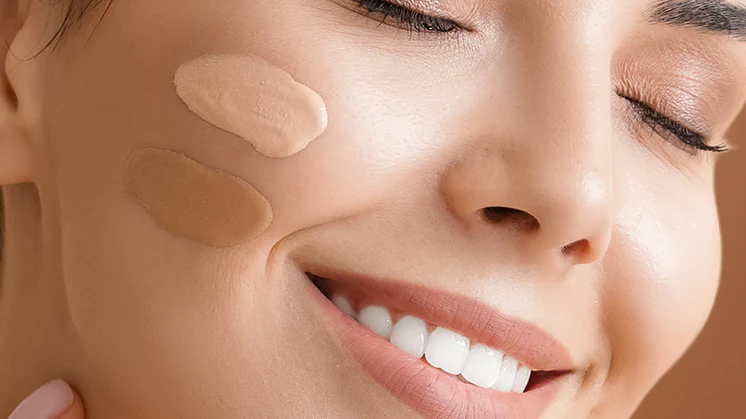
Pick the right color by testing it on your jaw instead of your hand or wrist. The best shade should match your skin so it looks like it’s part of you. If you’re unsure, choose a shade that’s a little lighter rather than darker. To put it on, you can use a wet sponge for a natural look—pat it gently on your skin. A brush helps build more coverage if you need it, and clean fingers work well for lighter makeup formulas. Start with a small amount and add more where you want it. Put the foundation on your forehead, cheeks, nose, and chin, then blend outward. Make sure to also blend onto your neck and ears if needed so everything looks even. The goal is to blend well so there are no visible lines.
Concealer Placement and Blending
You put concealer on after your foundation, not before. This helps you only use it where you really need more coverage. For under your eyes, draw an upside-down triangle and gently blend it outward toward your temples. For pimples or spots, use a small brush or your finger to gently press the concealer on the spot. Don’t rub—just press and blend the edges. If you want to make certain parts look brighter, put some concealer down the middle of your nose, on your chin, and on your forehead.
Easy Eyeshadow Tutorial: Creating Simple Makeup Looks
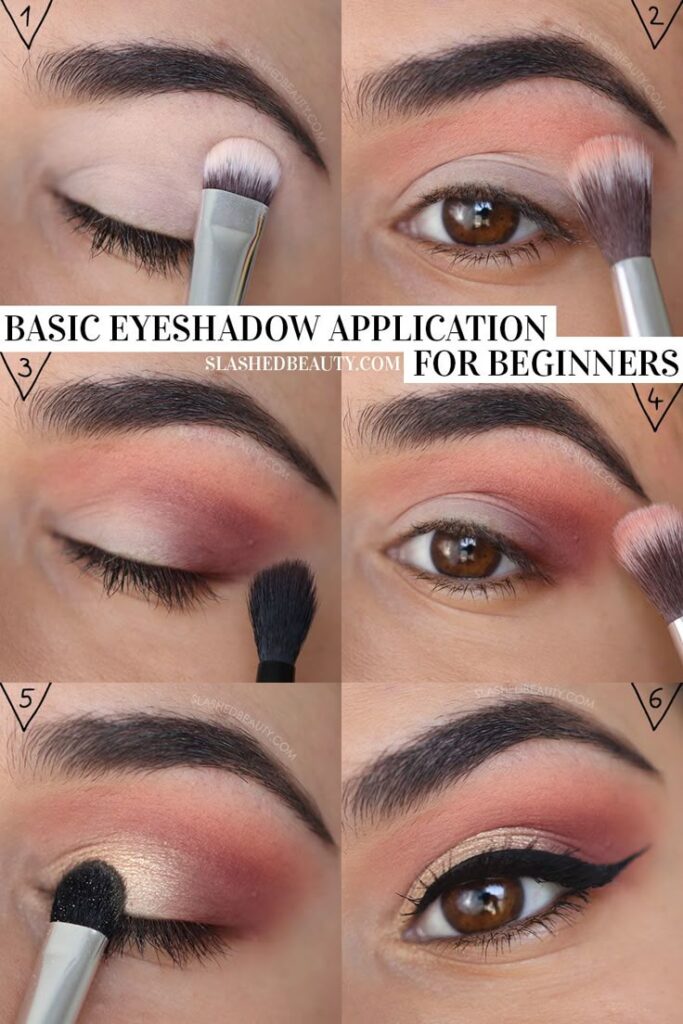
Eyeshadow can seem scary for people just starting out, but it doesn’t have to be hard. The secret is using simple, natural colors that are easy to mix together. This easy guide shows you how to add depth and make your eyes look nice without going overboard—great for simple makeup you can wear anywhere. The best part about neutral eyeshadow is that it’s almost impossible to mess up. Even if your blending isn’t perfect, the natural colors match your skin, so small mistakes aren’t obvious.
Neutral Eye Basics with Any Palette
Start by putting a light, matte color that matches your skin on your whole eyelid. This makes a nice smooth base and helps other colors blend better. Then, take a medium brown color and gently brush it into the crease of your eye with a fluffy brush, moving it back and forth like windshield wipers. To make your eyes stand out more, use a slightly darker color on the outer corner of your eye and blend it into the crease. If you want your eyes to look brighter, dab a shiny, light color on the inner corners and the middle of your eyelids. To blend everything smoothly, use a clean brush and make small circles. Don’t press hard—let the brush do the work. If you make a mistake, use a clean brush to gently soften the edges.
Quick Eye Enhancement Tips
Mascara can really change how your eyes look. Before putting it on, use an eyelash curler to gently curl your lashes. Start at the bottom of your lashes and wiggle the wand as you pull it up. Usually, one or two coats are enough for a natural look. For your eyebrows, brush them upward with a spoolie brush, then fill in any gaps with a brow pencil or powder that matches your hair. Finish by putting clear or tinted gel on your brows to keep them neat. Eyeliner isn’t needed for every look. If you want your eyes to stand out more, try lining just the upper waterline—this makes your lashes look thicker and gives a subtle boost.
Adding Colour: Blush, Bronzer, and Highlight for Natural Glow
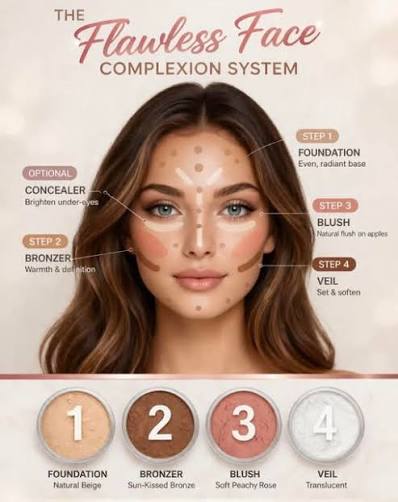
This is where your daily makeup routine becomes fun. Putting color on your face after applying foundation helps you look fresh and natural. The secret is to add color little by little—it’s easy to put more on, but hard to take it off. Imagine how your cheeks look after running outside—that’s the happy, natural glow you want to make with makeup.
Blush Application for Beginners
Finding the apples of your cheeks is easy—just smile naturally and put blush on the round part that sticks out. Use a soft brush and tap off extra blush before you put it on. Start with a little and add more if you want. Pick a blush color that looks like your natural blush—peachy colors are good for most skin tones, and pinks look nice on cooler skin. Brush the blush upward toward your temples to make your face look lifted. A common mistake is putting blush too low, which can make your face look droopy. Keep the blush on the round parts of your cheeks for the prettiest look.
Subtle Contouring and Highlighting
Bronzer should make your skin look like the sun gently kissed it, not dirty. Put it where the sun would hit your face—your forehead, cheeks, nose, and chin. Use a big, soft brush and blend it well. When using highlighter, use just a little. Put it on the high spots of your face—cheekbones, the bridge of your nose, inside corners of your eyes, and your cupid’s bow. You want a little glow, not shiny like a disco ball. If you’re just starting, cream highlighters and bronzers are easier to blend than powders. You can put them on with your fingers and mix them into your foundation smoothly.
Quick Makeup Tutorial: 15-Minute Everyday Look
Let’s put everything together into an easy morning routine. This simple makeup guide shows you how to look nice without feeling rushed. The secret is keeping your makeup stuff organized and doing things in the right order. When you practice, it becomes easy and quick. Soon, you’ll see how much faster you can get ready!
Morning Routine Breakdown
Start with putting on sunscreen and skincare while you get dressed—this helps it soak in. Put on primer or wait for your moisturizer to dry, then put on your foundation and concealer. Do your eye makeup next while the base is drying, then add blush, bronzer, and highlighter. Finish with mascara and a quick color on your lips if you want. Doing it this way helps prevent smudging and gives each part time to set. Use products that do more than one thing, like a cream blush that can be on your cheeks and lips, or a bronzer that can also be eyeshadow. A helpful tip: get your makeup ready the night before. Having everything ready makes your morning way easier.
Troubleshooting Common Beginner Mistakes
If your foundation looks patchy, it might mean your skin wasn’t prepared well or you didn’t blend enough. Try using a damp sponge to press over the patchy spots and make everything smooth. If your eyeshadow looks messy or muddy, you probably put on too much or didn’t blend with a clean brush. Use a clean brush to gently blend the edges or put a light color over the muddy part to make it look better. If your blush has harsh lines, blend the edges with a clean brush or lightly dust some see-through powder to soften the color.
Final Thoughts
Makeup for Beginners Learning how to do simple makeup is easy if you keep practicing and are patient with yourself. Remember, even the best makeup artists started as beginners. The most important thing is to use makeup that makes your natural beauty look better, not to change who you are. Start with just one or two products and add more as you get comfortable. There’s no need to hurry—makeup should be fun, not stressful.
Whether you try products from well-known brands or explore new ones, the best thing is to find what fits your style and makes you feel good. Smytten helps make this easier by giving you small samples of over 1,500 trusted beauty brands. Instead of buying full-sized products you might not like, you can try different foundations, eyeshadows, and blushes until you find what’s perfect for you. With trial packs costing only ₹249 and getting full cashback, you can try makeup without worrying about wasting money. After all, why settle for just guessing when you can try everything and find what makes you feel fantastic?